MultiMC5
MultiMC5 is a 3rd party launcher for Minecraft. It allows the user to easily manage several different "installations" (called instances) of Minecraft, either vanilla or modded. masa prefers using MultiMC for everything Minecraft related, both for playing on vanilla servers and for the several modded servers he has run over the years.
Note: MultiMC5 works with the new Minecraft launcher system that was introduced with Minecraft 1.6. In other words, with MultiMC5 it is possible to run all versions of Minecraft that are currently available, from old Alpha versions up until the most recent snapshots. With MultiMC4 you can only run up until Minecraft 1.5.2.
MultiMC5 installation
- Download MultiMC5 from http://multimc.org
- Extract the zip file somewhere, for example to a "MultiMC5" directory on your desktop or in your home directory.
- Move all the files to the top level MultiMC5 directory, if you got a separate MultiMC directory inside it while extracting the files. (And then remove the empty MultiMC directory.)
- For convenience, make a shortcut from MultiMC.exe to your desktop (on Windows...)
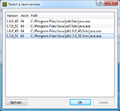
- Start MultiMC. On first start, it might ask for the java version you want to use, if you have multiple versions installed. Select the latest (1.8.0_92 at the time of writing)
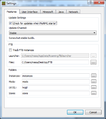
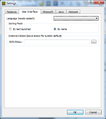
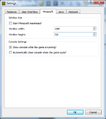
- Open settings, and change some setting to your liking, like the resolution and console behaviour. I like to leave the "Track FTB instances" unchecked for normal use, more of this below.
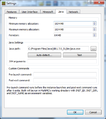
- On the java tab, if you are using Java 8 or newer, leave PermGen to the default 64 MB (it isn't used anymore in Java 8). If you are still using Java 7 or older, then set it to 256 MB if you play at least decent sized mod packs. Set the Minimum and Maximum memory allocation to an appropriate value, like 1024 MB/2048 MB/3072 MB/4096 MB, depending on how big mod packs you are playing. For vanilla Minecraft 1024 MB is fine.
- - Note: you could also leave these to the default values (or better yet, to 1024 MB & 1024 MB for min and max, and 64 MB for PermGen, if you also play vanilla through MultiMC like I do. Then you can change the memory setting for each modded instance separately, depending on the mod pack size.
- Now you have the basic settings done. Next add your Minecraft account to MultiMC by clicking the Accounts button on the top right corner, then select Manage Accounts.
- Click Add and input your Mojang or Minecraft login details. It should authenticate your account. Once it appears on the list, select it and click Set Default. Click Close.
- Now you should see you skin's face on the Accounts button, it is now the account that will be used when you launch the game.
Adding a new vanilla Minecraft instance
- You can add a new instance of Minecraft, for example vanilla 1.10.2, by clicking on the "Add a new instance" button
- Give it a name you like, an icon you like, and select the version of Minecraft from the list and click Ok. MultiMC will now fetch all the required files and libraries from Mojang.
- You are now ready to play vanilla Minecraft!
Adding a custom modded instance of Minecraft
- Start by creating a new instance the same way you do for vanilla, see above
- When you have created the new vanilla instance, then select it and click "Edit instance" from the right side menu or the right click menu
- On the "Version" tab, click "Install Forge", select the version you want, and click Ok
- When you want to upgrade or change your Minecraft version or your installed Forge version, you can do that from this Version menu
- Now all that is left to do is get the mods you want to use, and place then inside the minecraft/mods/ directory inside your just created new instance
- An easy way to disable/enable mods while testing things is via the "Loader mods" menu/tab inside the "Edit instance" menu. It just renames the mod files so that they have or don't have the extension ".disabled", which will prevent Forge from recognizing and loading them.
- You can also easily get to your mods/ directory via the "Loader mods" tab/menu, by clicking on the "View Folder" button on the bottom right. Another way to get to your instance directory is to select the instance in the main window and click on the "Instance Folder" or the "Config Folder" button, and then navigate a bit inside your file manager to get to where you want to go.
Adding a FTB mod pack into MultiMC5 (using the old FTB Launcher)
Note this my (masa) procedure for adding the FTB packs into MultiMC. I have the "Track FTB instances" checkbox normally unchecked, so that all the FTB packs don't clutter my MultiMC window, since I only play a couple of the packs, but I have dozens installed through the FTB launcher. That is why I only enable the tracking while I'm adding a pack into MultiMC.
- First you want to actually install the pack, and the version you want, through the FTB launcher. Once it's done, close the FTB launcher.
- Go to the MultiMC Settings and enable "Track FTB instances".
- You should now see all your installed FTB packs on your MultiMC main window. Select the pack you want to import and click the "Copy the selected instance." button and give it a name.
- You can now uncheck the "Track FTB instances" option again to get rid of the FTB pack clutter.
- If you set the Java memory settings in the global settings to 1024 MB and 64 MB, you need to change those for the FTB instance:
- Select the FTB pack instance, and click Settings from the right, to change the settings for just this instance.
- A good starting point is to set java min and max memory values to 2048 MB (2 GB) and PermGen to 256 MB. Larger packs might need PermGen of even 512 MB for huge packs and java memory values of 3072 MB (3 GB) or 4096 MB (4 GB). Click Ok.
- Try to start the newly added FTB pack instance. For me it usually launches a vanilla Minecraft (no MCP/Forge/FML info on the bottom left).
- If you got vanilla, quit the game. Select the instance and click "Edit mods" on the right. On the Version tab (for Minecraft 1.6), select "Install Forge" and select the version you want. For Minecraft 1.6.4 it is usually the latest, 965. Click Ok. Once it is done downloading it, click Close.
- Try to start the instance again. This time it should start with all the mods (since Forge is now installed properly).
- Optional: You can change the instance icon by clicking the big icon on the right menu.
